Reviving an IBM AT: Part 1 - Diagnosing a PSU Non-start
 The thrill of getting a new resident for my computer rest home doesn't happen as often as it used to. Frequency of acquisition has reduced to a trickle as I get down to the last few hard-to-get models on my wish list. Consequently, when I DO get a new addition these days, it's a big occasion.
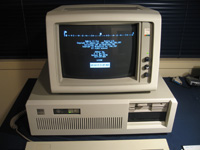
This latest unit, an IBM AT, was not only a big occasion, it was big, period! This beast is a HUGE and HEAVY warhorse of a microcomputer. It's a classic model that gave the industry the ISA standard, a keyboard style that lasted for almost 20 years, and a host of other long-lasting conventions. And I own an example at last!
After lugging it up the stairs (which was no mean feat...a block and tackle would have been appropriate) I carefully laid it on my work desk and took stock. Hmmm...a CGA monitor, one HUGE hard drive, a second 1/2 height drive, a 2MB RAM card and the usual serial/parallel card. Condition: Dirty and dusty but I could see all was needed was some TLC with some warm soapy water to have a fine looking machine!
The first task; to see if it went. I suspected this old iron hadn't seen any amps for years. That being the case I calculated there was about a 25% chance of it actually working on the first power up. I connected everything, drew a breath and flipped the big red switch. Fans started to whirr (hope started to stir)...then...fans slowed down and stopped. Silence. Nothing. Zilch. Switching on and off several times failed to register even the smallest sign of life.
Dead.
Isolating the Problem
When in doubt (and you don't know what else to do) disassemble, clean and inspect.
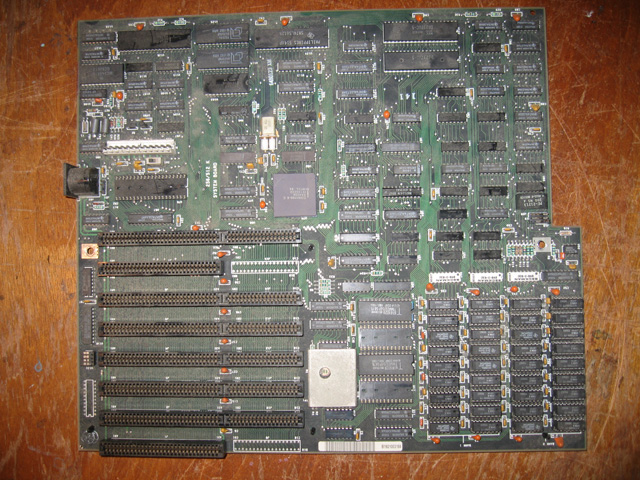
Photo 1. The AT Type-1 Motherboard
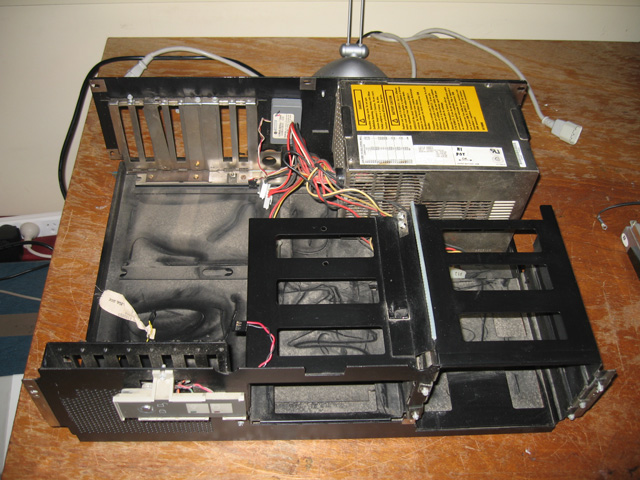
Photo 2. The IBM AT Case after chasing out the dust bunnies
Nothing was obvious from disassembly and an initial inspection. My first hypothesis, which I floated on the Vintage Computer Forums, was damaged capacitors in the power supply (PSU). This is a very common condition when reviving dormant dinosaurs. However, one thing I've learned in this hobby is not to jump to conclusions. More testing was needed. I know that PC power supplies have a "power good" state and, even if the PSU was fine, they wouldn't power up unless they felt the rest of the circuitry could handle it. Before blaming the PSU itself then, I needed to ascertain if it was completely broken, just weak (and hence wouldn't fire up with a full load) OR something was STOPPING it powering up. I tried the following tests, with the following results.
- Unplugged all drives leaving all cards attached - nothing.
- Unplugged the motherboard, but left the drives attached - the hard drives spun up!
- Unplugged all cards AND drives leaving just the motherboard and display card attached. - The computer booted! First the expected 161 error appeared, complaining out an unconfigured BIOS, then another error wondering where the disk controller was, then an instruction asking me to press F1. Doing this gently landed the machine in BASIC in ROM (I didn't realise until then that the IBM AT HAD BASIC in ROM!).
- Replaced the disk controller card - nothing.
- Unplugged all drives and tried to boot just with the disk controller card. - nothing.
Ok. I figured the two hard drives would draw a higher load that the controller card alone and if the PSU could activate with the former plugged in but not the latter alone, then the problem pointed squarely to the controller card itself.
Possibilities
What could the fault be? My forum friends felt a shorted capacitor might be to blame. This hypothesis seemed reasonable. A shorted cap would cause a short circuit, hence the PSU would never get the "power good" signal. Capacitors often give some indication of failure (they leak or explode) so I scrutinized the board carefully. Except for one suspicious-looking electrolyte, all caps looked fine. However, that didn't mean they WERE fine. I had had an experience in the past with an apple drive where the shorted capacitor had looked perfectly normal!
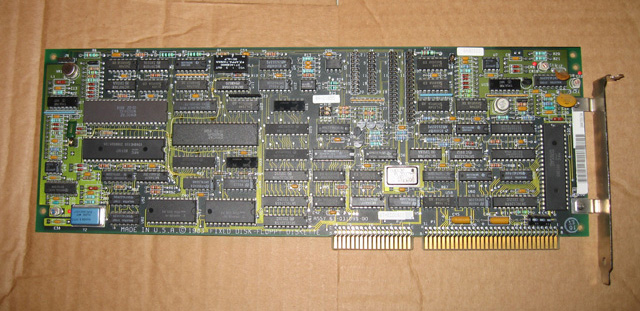
Photo 3. The (faulty) AT disk controller.
Hmm.. I had no circuit diagram for this board and wasn't sure where to start testing. However, the forums proved their worth again when one member suggested I check the 5 volt and 12 volt lines on the edge pins for a short and gave me the pin numbers that corresponded to those lines. All lines should show some resistance with a multimeter. If there is none (or virtually none) it's a short.
Using B1 as ground I started. B3 checked out fine, so did B12. B10 was ok, B7 was...hang on...the -ve 12 line was showing no resistance at all! Ah ha!. This was why the PSU failed to fire when the disk controller board was attached. There was a short on the -12v line.
Diagnosing and fixing the short
I felt the most likely cause of the short was a fused capacitor. However, there were dozens of them on this full-size card. How was I doing to find out which one?
If you put a multimeter set on ohms across a capacitor, it should show a lot of resistance. Certainly not zero. However a shorted cap IS likely to show zero, or close to it. I figured then, one way to narrow the possibilities would be to systematically measure across each capacitor attached to the board. Now if the reading said 0 or close to 0 this didn't mean the cap was faulty, as the lack of resistance may reflect the rest of the circuit rather than that across the capacitor. BUT if the Ohm reading was high, then it was HIGHLY UNLIKELY that particular capacitor was damaged. This was a way to at least reduce the number of possible "bad caps".
I started measuring across each cap. Once I'd finished I'd found only THREE caps which showed a reading of zero. This was good news. One of these must be the shorted cap.
 I decided to start with the largest of the suspect capacitors. This one was closest to the card edge. I unsoldered one end (see opposite), so I could take a true measurement across the capacitor rather than a reading from the part of the circuit with the lowest resistance.
The multimeter said 0.0 ohms. I took a reading across the circuit it had been attached to. I now got high ohms. I then tried B1 and B7 again. This time there was lots of Ohms showing. This capacitor was definitely shorted, and was on that -12v circuit! Success!!
The next day saw me fresh from the local electronics shop with two replacement capacitors, one for the shorted one I'd identified and the other for the electrolytic next to it which, although not shorted, did seem to be bulging and leaking some material out one end. Getting a direct replacement for the latter proved impossible as axial versions of this caps were no longer available. The guys in the forums assured me a radial one would do the job though.
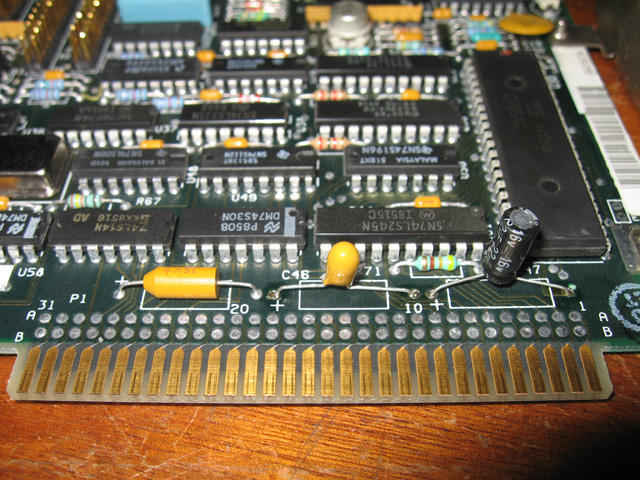
Photo 5. Disk controller showing the two replacement capacitors
So. in no time at all the two capacitors were replaced and it was time for the big test. I plugged the card in, Put an MS-DOS boot disk in drive A (I knew an unconfigured BIOS wouldn't allow me to boot off the hard drive) hooked up the drives and switched on.
Fans whirred...and stayed whirring! Hooray! The expected BIOS error warning appeared. I pressed F1...the floppy disk spun...and up came the MS-DOS time and date prompt!
The IBM AT lives!
Taking stock
So, I was 1/2 towards reviving this classic beast from its many years of slumber. Once more, the Vintage Computer Forums and the helpful folk who converse there proved invaluable. Again, this repair showed me that working through a problem slowly and methodically pays dividends, and often all you need for success is a multimeter, some guidance and some patience.
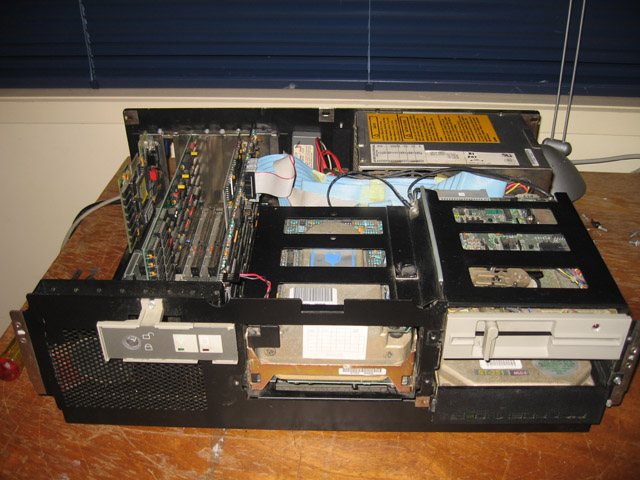
Photo 6. Alive but not yet healthy, the unclothed AT awaits a BIOS zap and hard drive check
The patient was no longer in a coma, but was still far from fighting fit. I had the BIOS issue to deal with and I had to check if the hard drives were ok. That experience is documented in Part 2.
Tez
17th August, 2009